Do you want to create courses and manage classes in WordPress? Recently one of our readers asked us how they add a learning management system in WordPress? In this article, we will show you how to add a learning management system in WordPress with WP Courseware, so you can run courses, manage classes and students, track progress, and so on.
Why Use WP Courseware as Your WordPress LMS
Most site owners who want to add a learning management system to their websites are not programmers or coders. You need a solution that takes care of all the complex programming and coding in the background. WP Courseware does that really well.
- WP Courseware is extremely easy to setup and manage.
- It comes with unlimited courses, lessons, quizzes, surveys and students.
- Creating courses and lessons is as simple as drag and drop.
- WP Courseware integrates beautifully with most popular WordPress membership plugins. You can sell courses with memberships on your site.
- It also integrates with WooCommerce and Easy Digital Downloads, allowing you to sell courses as products.
- There are extensive documentation and help available on the plugin's website. From the basic setup to advanced integrations, everything is well covered.
Getting Started with WP Courseware
First thing you will need to do is to install and activate the WP Courseware plugin.
WP Courseware is a premium plugin with prices starting from $99 for 2 sites with 1 year of support and updates.
Adding Courses
WP Courseware will add two new menu items labeled Training Courses and Course Units to your WordPress admin menu. Training courses is where you design your courses and modules. Course units is where you add actual lessons for your course.
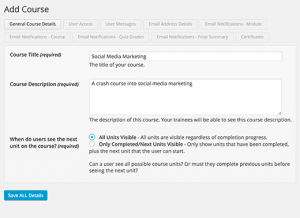
Simply click on Training Courses » Add Course to create your first course.
Provide a name and description for your course. After that you need to choose whether you want all course units to be visible to the users or just next course unit in the line.
Using the next unit in line option will restrict students from seeing the next course unit until they finish the previous unit.
Don't forget to click on save all details button to store your settings.
You will notice other tabs on the add new course window. These tabs allow you to change messages and emails that your students will receive when they join this course.
Creating Modules
A module is a collection of course units grouped together. Lessons in a series can be added into a module. Each training course can have as many modules as you want.
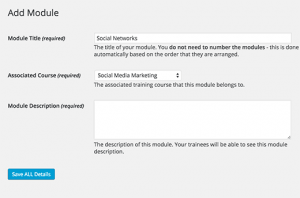
Simply visit Training Courses » Add Module to start adding your course modules. Provide a title for the module, select a training course, and enter the module description.
Adding Course Units
Course Units are like individual lessons that can be part of any module or training course in WP Courseware. Simply visit Course Units » Add New to create your first course unit.
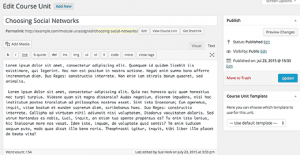
You will see a basic post edit screen where you can create your course unit. You can add text, audio/video, images, or attach documents just like you would in any WordPress post. Once you are satisfied with the course unit, click on the Publish button.
Course units you create here are not part of any training course or module yet. We will come to that part later.
Adding Quizzes
WP Courseware comes with quizzes and survey. These quizzes can be added to any module or training course. You can even require a student to pass a quiz before they can move to new module or training course. Simply visit Training Courses » Add Quiz/Survey page.
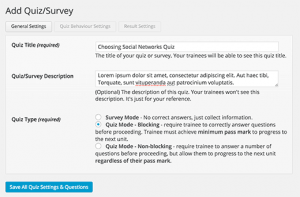
First you need to provide a title and description for the quiz/survey. After that you need to choose a Quiz Type. You can choose from survey mode, quiz mode – blocking, and quiz mode non-blocking.
Choosing the quiz mode – blocking as your quiz type, will require users to pass the quiz in order to move on to the next module or training course.
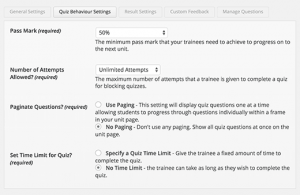
Next, you need to switch to Quiz Behavior Settings tab. This is where you can set the passing percentage, quiz attempts, and time restriction settings for the quiz.
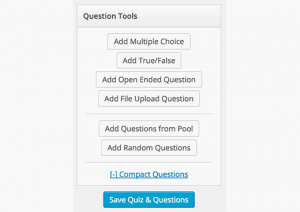
Saving your quiz settings will show you the questions toolbar on the right. You can choose from adding multiple choice, true false, and open ended questions. You can allow users to upload documents as their quiz answers.
Once you have enough questions in your quiz, click on the save all settings and questions button to store your quiz.
Adding Course Units and Quizzes into Modules and Courses
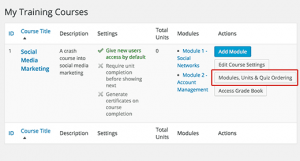
After creating your quizzes and course units, it is time to add them to your training courses and modules. Simply visit Training Courses page where you will see the list of all your training courses. Click on the modules, units, quiz ordering button under the actions column.
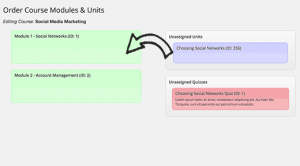
This will bring you to the order course modules and units screen. Here you can drag and drop the course units and quizzes to the modules.
Displaying Course Outline on Front-end
WP Courseware makes it quite easy to display your course online on the front-end. Start by creating a new WordPress page and add this shortcode:
[wpcourse course="1″]
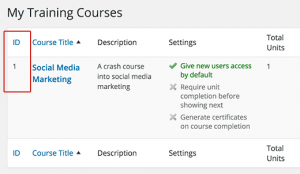
Replace course="1″ with the ID of the course you want to display. You can find course ID on the main training course page.
Controling Access and Selling Courses
WP Courseware offers multiple ways to control who can access the courses on your site and how you can sell the courses.
Method 1: Using WordPress Registration
You can use the default WordPress registration system to control who can access the courses. Using this method, you can create a custom login page with Theme My Login and allow users to register and login from the front-end of your site.
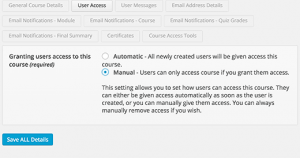
Simply visit Training Courses and edit your course. On the course edit screen, click on the User Access tab.
There are two options for you to select. The first one automatically allows any registered users access to the course, and the second option allows you to manually add users to the course.
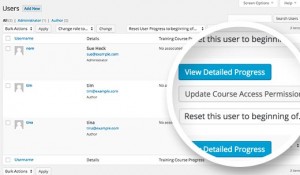
If you choose the manual method, then here is how you will add users to a course. Visit the Users screen in WordPress admin area and click on the ‘Update Course Access Permissions' button next to a username.
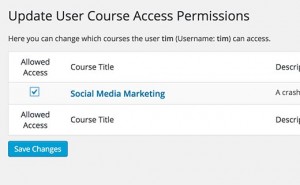
You can now simply check or uncheck the box under the Allowed Access column to give or remove access from a course.
Method 2: Using a WordPress Membership or eCommerce Plugin
This method is ideal if you want to sell courses along with memberships on your site. WP Courseware offers integrations with most popular membership and eCommerce plugins.
The integration list includes Easy Digital Downloads, WooCommerce, Magic Members, S2members, Paid Memberships Pro, etc. Most of these integrations are available as free addon plugins.
We hope this article helped you add a learning management system in WordPress using WP Courseware. You may also want to see our guide on how to create a questions and answers site in WordPress.
If you liked this article, then please subscribe to our YouTube Channel for WordPress video tutorials. You can also find us on Twitter and Facebook.
The post How to Add a Learning Management System in WordPress with WP Courseware appeared first on WPBeginner.


No comments:
Post a Comment